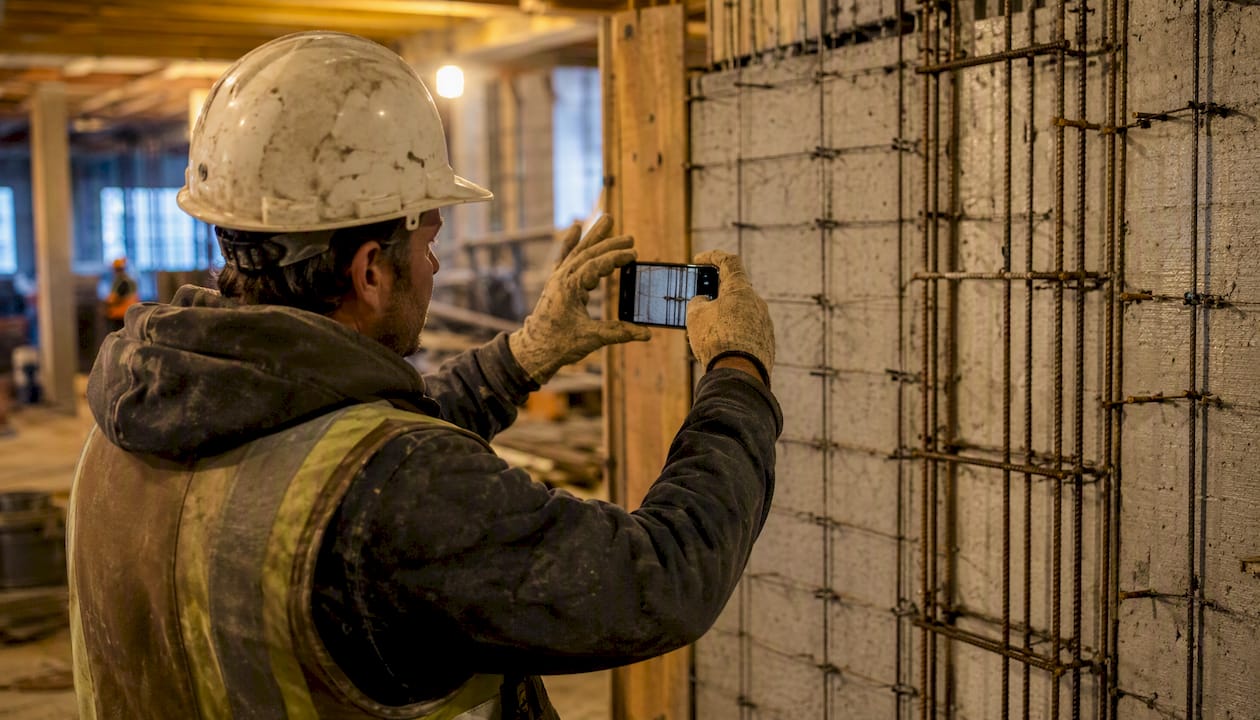
Jobsite photo documentation provides a time-stamped, GPS-verified visual record that prevents disputes, supports draw requests, tracks progress, and creates accountability across every phase of a project. Think of it as the construction equivalent of a court reporter: it captures what happened, where, and when, without relying on anyone’s memory.
The four core functions that make it non-negotiable:
- Dispute prevention: Photos establish baseline conditions and document work-in-place before it gets covered up.
- Progress tracking and draw support: Lenders and owners need visual proof that work is complete before releasing funds.
- Quality assurance and inspections: Phase-specific shots catch defects before they become change orders.
- Change-order proof: Photos document scope additions, differing site conditions, and material substitutions in real time.
Industry bodies including AACEI (Association for the Advancement of Cost Engineering International) and the AIA (American Institute of Architects) have both published formal guidance on jobsite photography, which tells you something about how seriously the industry takes it. Photo documentation is defined as the systematic capture of images to record progress, conditions, or changes for use as an objective project record.
Key Takeaways
Consistent, stamped, phase-specific photo documentation is the most reliable way to prevent construction disputes, speed draw approvals, and protect your project record under U.S. legal standards.
| Point | Details |
|---|---|
| Capture before concealment | Pre-cover shots of MEP, waterproofing, and structural work are the photos most needed in disputes. |
| Burn in visible overlays | Timestamp, GPS, and project ID stamped into the image survive file transfers that strip EXIF metadata. |
| Distribute responsibility | Assign daily capture to the foreman, phase shots to QA, and weekly audits to the PM — never one person. |
| Link photos to project records | Photos attached to daily logs, RFIs, and draw packages are evidence; photos in a camera roll are not. |
| Debecorp’s CHERP platform | CHERP stamps, links, and audits photos within the daily log workflow, built for field adoption by trades crews. |
Table of Contents
- Why photo documentation is non-negotiable for construction projects
- Phase-by-phase checklist: what to capture and when
- How to take usable, defensible jobsite photos
- Legal cautions: how indiscriminate photography can create liability
- What to look for in photo-documentation software
- How to organize, store, and retrieve photos so they remain useful
- Practical workflow: who captures photos, cadence, and review
- A copyable daily photography checklist for crews and supervisors
- Why this guide centers trades input and practical field adoption
- CHERP and SiteComm give your team a photo record that holds up
- Sources
Why photo documentation is non-negotiable for construction projects
Photos do something no written report can: they remove ambiguity. A superintendent’s note that says “concrete placed at column line B-4” is useful. A timestamped, GPS-tagged photo of that pour, showing the rebar layout, the pour height, and the crew working, is evidence.
The operational benefits stack up fast. Owners and GCs who maintain organized photo records report fewer truck rolls to verify completed work, faster draw approvals because lenders can review photos remotely, and tighter punchlists because inspectors can compare finish-phase photos against submittals. Subcontractors benefit too: a photo of installed MEP rough-in before drywall goes up is the single best defense against a later claim that work was never done.
Lenders and insurers have raised the bar. Organized photo records speed draw approvals and claim resolution because reviewers can verify conditions without a site visit. On federally funded or bonded projects, photographic backup for pay applications is increasingly expected, not optional.
The AACEI Recommended Practice 95R-18 puts it plainly: photographs communicate jobsite status far more effectively than text when the process is planned and organized. The key word is “planned.” Random snapshots taken whenever someone remembers create gaps. A structured program tied to project phases and milestones creates a defensible record.
Key operational benefits worth calling out:
- Fewer disputes over existing conditions when pre-construction photos establish a clear baseline.
- Faster resolution of RFIs and submittals when reviewers can see the actual field condition.
- Reduced rework costs when QA photos catch installation errors before concealment.
- Stronger claims support for weather delays, differing site conditions, and force majeure events.
- Improved jobsite communication between field crews, PMs, and remote stakeholders who can’t be on-site daily.
Phase-by-phase checklist: what to capture and when
The shots that matter most are the ones taken before something gets covered up or changes hands. Here is a phase-based breakdown of what to capture and why.
1. Pre-construction and site survey
Purpose: Establish baseline conditions so you can prove what you inherited.
- Photograph all four sides of the structure and every adjacent property boundary.
- Document existing cracks, staining, settlement, or damage with close-up shots and a scale reference.
- Capture utility markings, site access conditions, and any stored materials already on-site.
- Use consistent framing so post-construction comparisons are meaningful. Winterthur’s photographic documentation principles emphasize photographing before treatment with consistent framing — the same logic applies to construction baselines.
2. Mobilization and site setup
Purpose: Record who and what arrived, and in what condition.
- Photograph equipment deliveries with serial numbers visible.
- Capture material staging areas and storage conditions (especially moisture-sensitive materials).
- Document temporary protection measures: shoring, erosion controls, dust barriers.
3. Rough-in: MEP, structural, and concealed conditions
Purpose: These are the shots you will need most in a dispute, and they disappear behind drywall.
- Photograph all MEP rough-in (plumbing, electrical, HVAC) before inspection and before cover.
- Capture structural connections, anchor bolts, rebar placement, and embedments.
- Document waterproofing and moisture barriers before they are covered.
- Take wide, medium, and close-up shots of each condition: wide for location context, medium for the assembly, close-up for the detail.
4. Deliveries and material inspections
Purpose: Prove what arrived, when, and in what condition.
- Photograph delivery tickets alongside the materials they reference.
- Capture any damaged or rejected materials before they leave the site.
- Document serial numbers and lot codes for equipment and specialty items. Equipment tracking records pair naturally with delivery photos to create a complete chain of custody.
5. Daily progress
Purpose: Build a continuous timeline that supports schedule claims and draw requests.
- Shoot consistent angles from fixed reference points each day.
- Capture crew activity, work-in-place, and any conditions that deviate from the plan.
- Scheduled photography combined with 24/7 camera coverage and periodic drone overviews provides the most complete program for commercial projects, reducing the gaps that lead to disputes. Time-lapse and continuous footage are particularly valuable for delay and weather-event documentation because they capture activity outside scheduled visits.
6. Finishes and pre-close-out inspections
Purpose: Document quality before the owner walks the job.
- Photograph installed finishes against approved submittals and samples.
- Capture punchlist items with location context (room number, grid line, elevation).
- Document any approved substitutions with the approval reference visible or noted.
7. Close-out and turnover
Purpose: Protect against post-turnover claims.
- Photograph all systems in operating condition: mechanical, electrical, plumbing.
- Capture final site conditions, including restored landscaping and removed temporary facilities.
- Document as-built conditions for any field changes.
8. Incidents and near-misses
Purpose: Preserve evidence before conditions change.
- Photograph immediately, before cleanup or repair.
- Capture wide context, then medium and close-up detail.
- Include any contributing conditions: spills, obstructions, weather, signage.
Drone or aerial coverage adds unique value on large sites, phased projects, or when earthwork quantities are disputed. For a single-trade interior fit-out, it is usually unnecessary overhead.
How to take usable, defensible jobsite photos
A photo is only as good as what it proves. Composition plus metadata plus context equals a usable photo. Without all three, you have a picture; with all three, you have evidence.
Composition basics:
- Always shoot the sequence: wide (location context), medium (the assembly or condition), close-up (the detail). Never skip the wide shot. A close-up of a cracked pipe means nothing without a photo that shows where in the building it is.
- Include a recognizable anchor in every shot: a column grid label, a room number sign, a tape measure, or a coin for scale.
- Shoot from a consistent position when documenting recurring conditions so comparisons are meaningful over time.
Metadata requirements:
- Visible timestamp, GPS coordinates or address, and project ID should be burned into the image itself, not just stored in EXIF data. EXIF metadata is often stripped during common file transfers, including email attachments and messaging apps. Visible overlays survive those transfers and are more defensible in arbitration and insurance review.
- A compact naming template that works in practice:
[ProjectID]_[Phase]_[LocationCode]_[YYYYMMDD]_[SequenceNumber]— for example,PRJ042_RGH_B4-ELEC_20260315_003.jpg. - Tag photos to the relevant drawing number, RFI, or daily log entry at the time of upload, not days later.
Pro Tip: Never share original photos through consumer messaging apps like iMessage or WhatsApp. Both platforms compress images and strip EXIF metadata. Share originals through your project platform or a cloud folder, and keep the originals in a separate backup. Chain of custody starts with preserving the file as captured.
Common mistakes that create evidence gaps: missing pre-construction photos, inconsistent timing with gaps of several days or weeks, poor file organization that makes retrieval impossible, and relying on one person to carry all the knowledge. Distribute the responsibility before it becomes a single point of failure.
Legal cautions: how indiscriminate photography can create liability
Photos help, but they can also hurt if taken without discipline. AIA guidance is direct on this: indiscriminate photography creates legal exposure when photos show defects that are not documented in field reports. A photo of a cracked beam that never made it into a field report is not just unhelpful; it can be used against you to show you knew about the defect and failed to act.
Practical safeguards to put in place:
- Annotate intent at capture. Every photo should have a caption or tag explaining why it was taken. “Documenting approved waterproofing installation per spec 07 21 00” is defensible. An unlabeled photo of the same condition is ambiguous.
- Link photos to field reports. A photo that exists only in a camera roll is not part of the project record. Attach it to the daily log, the RFI, or the inspection report it supports.
- Avoid unnecessary identifiable worker images. U.S. privacy considerations and potential NLRA sensitivities mean photographing workers in ways that could be construed as surveillance requires care. Focus on work-in-place, not people.
- Post site photography notices. A posted notice that photography is conducted for project documentation purposes is a simple, low-cost step that reduces ambiguity about why photos are being taken.
- Preserve chain of custody. Courts and insurance adjusters look for authentication (who took it, when, with what device), foundation (does the photo accurately represent what it purports to show), and custody (has the file been altered). Original files with intact metadata, stored in a controlled system with access logs, satisfy all three.
Pro Tip: The moment you take a photo of a condition, add a one-line caption in your platform or field report: what you saw, what it relates to, and any action taken or required. That 10-second step removes the ambiguity that turns a helpful photo into a liability.
Paperless field reporting makes this pairing automatic: photos upload directly into the daily log entry, timestamped and linked to the relevant work item.
What to look for in photo-documentation software
The right platform does more than store photos. It makes them retrievable, defensible, and useful to people who weren’t on-site when the shot was taken.
Prioritize these features when evaluating options:
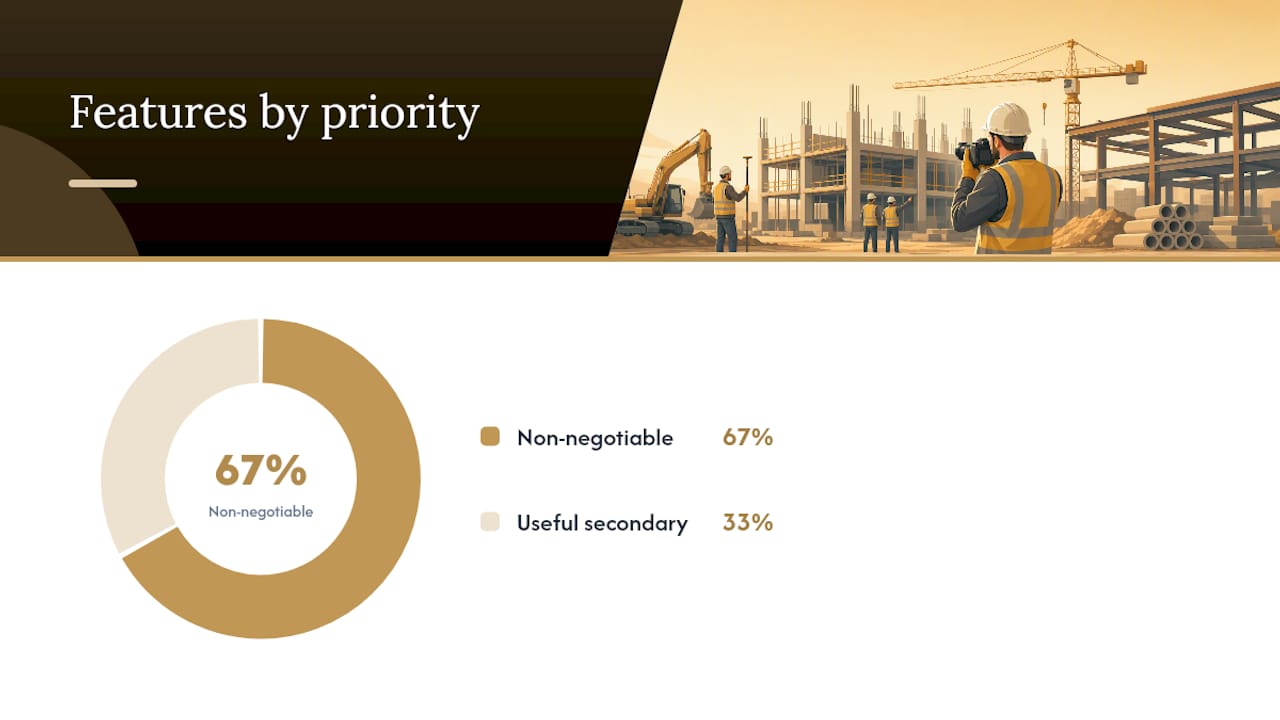
Non-negotiable features:
- Visible stamping. Timestamp, GPS coordinates, and project ID burned into the image at capture. Not just stored in metadata.
- Offline capture with sync. Crews work in basements, tunnels, and rural sites without signal. The app must capture and queue photos offline, then sync automatically when connectivity returns.
- Annotation tools. The ability to draw on a photo, add a text note, or flag a condition before sharing.
- Audit trail. An immutable log showing who uploaded what, when, and whether the file has been modified.
- Exportable evidence bundles. When a dispute or draw request requires documentation, you need to export a package of photos with metadata intact, not screenshot individual images.
- Integrations. Photos should link to daily logs, RFIs, change orders, and submittals without manual re-entry. Disconnected documentation workflows cause delays and risk; integrated capture within project platforms reduces that friction.
Useful but secondary:
- Auto-tagging by location pin or drawing reference.
- Role-based upload permissions (foreman uploads, PM reviews, admin organizes).
- Folder and location taxonomy that mirrors the project’s WBS or drawing set.
The tradeoff between a simple browser-based stamping tool and a full field operations platform comes down to scale and reporting needs. A small subcontractor on a single project may need nothing more than a stamping app. A GC running multiple projects with multiple subs needs role-based permissions, cross-project search, and audit trails that hold up in arbitration.
CHERP and SiteComm, Debecorp’s field platforms, address these needs directly: project-stamped photos link to daily logs and attendance records, offline capture queues sync on reconnect, and role-based permissions control who can upload, review, and export. The audit trail is built into the platform, not bolted on after the fact.
How to organize, store, and retrieve photos so they remain useful
A consistent naming taxonomy plus centralized storage plus cross-references to drawings and RFIs equals retrievability. Without that structure, photos become a liability: you know they exist, but you can’t find them when a dispute surfaces 18 months later.
Recommended metadata fields to store per photo:
| Field | Example Value |
|---|---|
| Date and time | YYYYMMDD and time formats as required |
| GPS coordinates | GPS coordinates |
| Project ID | PRJ042 |
| Phase | Rough-in |
| Location code | B4-ELEC |
| Tags | MEP, electrical, pre-cover |
| Linked RFI or drawing | RFI and drawing number |
| Captured by | J. Torres, Foreman |
Storage and retention guidance:
- Use cloud storage with exportable archives. Avoid platforms that lock photos behind a proprietary format you can’t export.
- Maintain at least one local backup for sensitive or high-stakes projects.
- Set a retention policy before the project starts. Most construction attorneys recommend keeping project photos for at least the applicable statute of repose in your state, which in many U.S. jurisdictions runs 10 years for latent defects.
- For legal use, export photos as original files with metadata intact, not as PDFs or screenshots. Courts and adjusters want the original file.
Link photos to draw requests, change orders, and submittals at the time of submission. A draw package that includes organized, phase-specific photos with visible stamps moves faster through lender review. Centralized document sharing practices make this retrieval reliable across the project team.
Practical workflow: who captures photos, cadence, and review
Make photography part of the job cadence and distribute responsibility. When one person owns all the documentation, a sick day or a personnel change creates a gap in the record.
Roles and responsibilities:
- Foreman or superintendent: Daily route at start or end of shift. Consistent angles, progress shots, any conditions that deviate from plan.
- QA inspector or project engineer: Phase-specific shots tied to inspection hold points. Pre-cover shots of MEP rough-in, waterproofing, structural connections.
- Project manager: Weekly verification that photos are being captured, named correctly, and linked to the right records. Not taking photos, but auditing the record.
- Documentation admin or coordinator: Organizes uploads, applies taxonomy, backs up archives, and prepares export packages for draw requests or disputes.
Recommended cadence:
- Daily start-of-shift walk: foreman captures progress and conditions.
- Milestone or inspection shots: QA captures before any concealment.
- Immediate incident capture: whoever is closest captures the scene before cleanup.
- Weekly PM audit: verify completeness and naming compliance.
- Draw-cycle export: admin prepares and submits photo package with each pay application.
Review and sign-off should be built into the daily log workflow. A daily log entry that includes attached photos, reviewed and approved by the superintendent, creates a contemporaneous record that is far stronger than photos stored in a separate folder with no connection to the project narrative. Real-time jobsite updates tied to photo capture make this review loop faster and more consistent.
A copyable daily photography checklist for crews and supervisors
Print this, paste it into your daily log template, or use it as a toolbox talk handout.
Daily photo route:
- Start-of-shift: photograph site entry conditions and any overnight changes.
- Active work areas: wide shot for location context, medium for the assembly, close-up for the detail.
- Concealment items: photograph all MEP, waterproofing, or structural work before cover.
- Deliveries: photograph ticket and materials together; capture any damage.
- Incidents or near-misses: photograph immediately, before cleanup.
- End-of-shift: photograph work-in-place and site security conditions.
Before you upload, check:
- Visible timestamp and GPS overlay present on each photo.
- File named per project convention:
[ProjectID]_[Phase]_[LocationCode]_[YYYYMMDD]_[Seq]. - Photo linked to the relevant daily log entry, RFI, or drawing.
- Caption or annotation added explaining what the photo documents.
- Original file uploaded (not a screenshot or compressed copy).
- Backup confirmed in secondary storage location.
Weekly audit (PM or superintendent):
- Verify no gaps in the daily sequence.
- Confirm pre-cover shots exist for all concealed work completed that week.
- Check that incident photos are linked to incident reports.
- Review naming compliance and correct any errors before they compound.
A printable PDF version of this checklist, formatted for daily log binders and toolbox talks, is available through the Debecorp platform for teams using CHERP.
Why this guide centers trades input and practical field adoption
The guidance in this article reflects a straightforward premise: documentation practices that don’t work in the field don’t get used. A checklist designed in an office by someone who has never run a daily route on a commercial job will get ignored by the second week.
Debecorp built CHERP and SiteComm from the ground up with direct input from tradespeople who run those routes every day. The photo documentation features in CHERP, including project stamping, offline capture, and daily log integration, were designed around the actual constraints of field work: no signal in the basement, no time for a five-step upload process, no tolerance for software that requires a training course to operate.
The phase-by-phase guidance, the metadata standards, and the workflow roles described here reflect what actually works on U.S. jobsites, informed by AACEI’s recommended practices and AIA’s legal cautions, and grounded in the practical reality that the best documentation system is the one crews will actually use consistently.
CHERP and SiteComm give your team a photo record that holds up
Most photo documentation problems aren’t about effort. Crews take photos. The problem is that those photos end up in personal camera rolls, shared through messaging apps that strip metadata, and organized in folders no one can search 14 months later when a dispute surfaces.

CHERP and SiteComm solve the structural problem. Photos captured through CHERP are stamped with visible project ID, timestamp, and GPS at the moment of capture. They link directly to the daily log entry, the relevant RFI, or the draw package, without a separate upload step. Offline capture means no gaps when crews are working below grade or in dead zones. Role-based permissions keep the record clean: foremen upload, PMs review, admins export. The audit trail is immutable.
When a lender asks for draw support or an adjuster requests documentation of a weather event, your team can produce an organized, exportable evidence bundle in minutes, not days. See how CHERP and SiteComm work for your project team, or visit Debecorp to request a demo.
Sources
The following sources support the guidance in this article. Each is worth reading in full if you are building or auditing a photo documentation program.
- 95R-18: Construction Photography to Document Project Status
- Using photography to evaluate on-site work | AIA
- Photographic documentation - Winterthur Museum, Garden & Library
- Photo Documentation Explained: A Comprehensive Overview